Building a Cloud Native Application using Spring
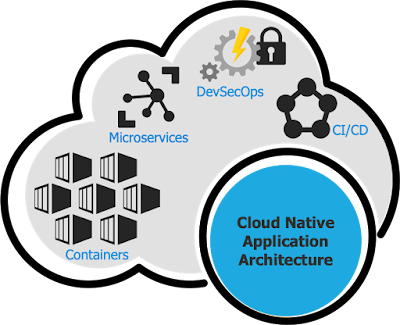
Cloud native applications are one of the most impactful ways of building applications for the global population. Spring Boot mixed with Spring Cloud gives developers a rapid starting point for building Cloud Native as well as Microservices based systems.
WHAT ARE MICROSERVICES?
It is similar to Services Oriented Architecture or SOA but are not SOA. In Microservices, the communication is mostly being made using REST or gRPC (uses Protocol Buffers as binary data interchange) where SOA communicates using SOAP. A single microservice is a single domain, single purpose service such as data service and process service.

WHY SPRING BOOT?
Spring Boot was designed for two main purposes, Microservices is one of them. Spring cloud adds 12 factor plumbing to a Java Based Microservices Application.
Our main focus is to Build a Microservices and Cloud Native Application rather than a Spring Based Application. Spring Boot with the help of Spring Cloud serves the purpose.

TYPES OF SERVICES
* Data Services - Microservices that serve data for a single domain
* Process/Buiness Services - Microservices that aggregate one or more data services and apply business processing
* Web Application Services - Microservices that serve a single purpose web application
It is an Data Service for Employee.
Note create two SQL scripts - data.sql and schema.sql for inserting data and defining data schema respectively and place them in resources folder. In java folder, place following files in addition to Main class:
Now Run the application and test it in browser.
Spring boot lets us externalize the configuration so that we can work with same application code in different environments.
We can create a Config server which manages all the microservices. We need to manage just the Config server and it will itself manage the microservices. The microservices will become the client of the Config server. It also acts as central variables management. And the configurations will be controlled by Version control (Git).
Steps involved:
Now initalize it as a git repo and commit it.
Now run the config server. Access url : <host>:9000/<microservice_name>/default.
Add bootstrap.properties file in resources:
Now run it and check.
Eureka Server is much like Config Server and has a built-in dashboard which supports replication.
Eureka Client works much like Config client and leverages spring.application.name.
Run the application and go to <host>:8761.
Restart the application and refresh the eureka server page to check visibility of the microservice. (Ignore the warnings as of now)
Create a new Spring project from start.spring.io with name main-service. It is a type of business service that integrates multiple domains (a single microservice represents a single domain). Add dependencies - web, spring-cloud-starter-netflix-eureka-client and spring-cloud-starter-ribbon.
Configure the application as:
Note: We got SERVICEONE from Eureka Registry.
Run the application and check.
We can also use Feign Client instead of Rest Template by adding above new class and configuring old app as:
This is the most basic implementation of Microservices Cloud Native Application. We will work on API Gatways, Microservice Intercommunication using Messaging rather than Rest Templates or Feign Clients and a production like application in coming tutorials.

WHAT ARE MICROSERVICES?
It is similar to Services Oriented Architecture or SOA but are not SOA. In Microservices, the communication is mostly being made using REST or gRPC (uses Protocol Buffers as binary data interchange) where SOA communicates using SOAP. A single microservice is a single domain, single purpose service such as data service and process service.

WHY SPRING BOOT?
Spring Boot was designed for two main purposes, Microservices is one of them. Spring cloud adds 12 factor plumbing to a Java Based Microservices Application.
Our main focus is to Build a Microservices and Cloud Native Application rather than a Spring Based Application. Spring Boot with the help of Spring Cloud serves the purpose.

TYPES OF SERVICES
* Data Services - Microservices that serve data for a single domain
* Process/Buiness Services - Microservices that aggregate one or more data services and apply business processing
* Web Application Services - Microservices that serve a single purpose web application
MICROSERVICE 1
Start with a Spring Boot starter template from start.spring.io with dependencies - Spring Web, Spring Data JPA and H2 DB. Name it according to the purpose it solves, I will call it - service-one.It is an Data Service for Employee.
Note create two SQL scripts - data.sql and schema.sql for inserting data and defining data schema respectively and place them in resources folder. In java folder, place following files in addition to Main class:
Now Run the application and test it in browser.
EXTERNAL CONFIGURATION
Till now, we created a single microservice and it runs on its default port of 8080. As we create more microservices, they can't run on same port of 8080. Though we can change the port of microservice in application properties file but it will become difficult to manage them and configure them. Especially when we run our microservices on different environments.Spring boot lets us externalize the configuration so that we can work with same application code in different environments.
We can create a Config server which manages all the microservices. We need to manage just the Config server and it will itself manage the microservices. The microservices will become the client of the Config server. It also acts as central variables management. And the configurations will be controlled by Version control (Git).
Steps involved:
Setting Up External configuration
Create a config folder with <name_of_microservice>.properties files. Structure of it is as:Now initalize it as a git repo and commit it.
Setting Up Configuration Server
Create a new Spring project from start.spring.io with spring-cloud-config-server dependency. Name it ConfigServerApplication. Configure the structure of project as:Now run the config server. Access url : <host>:9000/<microservice_name>/default.
Setting Up Microservice as Client
Change the previous structure and update it as:Add bootstrap.properties file in resources:
Now run it and check.
SERVICE DISCOVERY WITH EUREKA
As we start to build distributed systems, its become obvious to identify where our service endpoints are. Eureka is a discovery platform by netflix and has a rest based interface.Eureka Server is much like Config Server and has a built-in dashboard which supports replication.
Eureka Client works much like Config client and leverages spring.application.name.
Setting up Eureka Server
Create a new Spring project from start.spring.io with name eureka-server and dependency spring-cloud-starter-eureka-server. Configure it as:Run the application and go to <host>:8761.
Microservices Registration on Eureka
Make following changes in microservice project:Restart the application and refresh the eureka server page to check visibility of the microservice. (Ignore the warnings as of now)
Consuming Microservices with Ribbon
Since we only have a single instance of each service up and running, we don't need Ribbon's Load Balancing. For our case, we don't have a load balancer involved. Ribbon provides a way to integrate load balancer to our web service calls.Create a new Spring project from start.spring.io with name main-service. It is a type of business service that integrates multiple domains (a single microservice represents a single domain). Add dependencies - web, spring-cloud-starter-netflix-eureka-client and spring-cloud-starter-ribbon.
Configure the application as:
Note: We got SERVICEONE from Eureka Registry.
Run the application and check.
We can also use Feign Client instead of Rest Template by adding above new class and configuring old app as:
This is the most basic implementation of Microservices Cloud Native Application. We will work on API Gatways, Microservice Intercommunication using Messaging rather than Rest Templates or Feign Clients and a production like application in coming tutorials.


Comments
Post a Comment